Showing posts with label peanut butter. Show all posts

Thursday, April 19, 2012

Pumpkin and Peanut Butter Dog Treats


During my previous employment at a Doggie Daycare, I came to learn that dogs actually LOVE canned pumpkin.  Not only do my dogs go crazy for it when mixed in with their food, but it's a great source of fiber as well.

As I've asked in the past, please make sure your dog doesn't have any allergies to these ingredients!  Try in small doses if unsure, and make sure there aren't any upset tummies.  Yes, this recipe calls for cinnamon, which is fine for dogs in small doses, and has even been said to help increase blood flow.  If at all concerned, please leave it out, I'm sure your dog will still enjoy them. ;]

Some of the cookies I rolled into small balls and pressed slightly in a criss-cross pattern with a fork to resemble peanut butter cookies, others I used a small maple leaf cookie cutter.  I wanted some softer cookies as well as crunchy ones.  For softer cookies take them out of the over right away, whereas for harder cookies leave them in the turned off oven until they get as hard as you like.  If still not as hard as you want your treats to be, consider baking them for 5 minutes longer.

The only change I made was increasing the amount of canned pumpkin, as this made the dough more manageable without the addition of water.

Pumpkin and Peanut Butter Dog Treats
Adapted from "Peanut Butter and Pumpkin Dog Treats," by Kelly
www.allrecipes.com
Makes 25 medium servings, or 40+ smaller servings


  • 2 1/2 cups whole wheat flour (plus some extra to flour surface)
  • 2 eggs
  • 1 cup canned pumpkin (NOT PUMPKIN PIE MIX)
  • 2 tablespoons peanut butter (smooth)
  • 1/2 teaspoon ground cinnamon (optional)
  • 1/2 teaspoon salt (optional)

~Preheat your oven to 350°F. Line a baking sheet with parchment paper.

~Mix all ingredients in a large bowl with a heavy spoon until a dough forms.

~Place the dough onto a lightly floured surface and knead it. You will then want to roll out your dough until it is about 1/2" thick.  At this point you can use your cute cookie cutters, or whatever means you like, to get your desired shapes and sizes.

~Bake your treats on your lined baking sheet for roughly 30-35 minutes, or until golden brown and slightly hard to the touch.  For a harder treat, rather than removing them from the oven at this point, turn your oven off, and let the treats sit for another 10-30 minutes. (If worried too hard, make sure a butter knife can break one)

~Cool them off completely, and let your puppies enjoy!  These should be stored in an air tight container or zip lock bag.

Daisy gets more of these than she should, haha, but how could I resist that face! xxoxx

Tuesday, April 3, 2012

Peanut Butter Dog Treats #2

The last Peanut Butter Dog treats I posted were more like scones, whereas these give you the option to cut out cute shapes like a traditional cookie dough.  As you can see however, I do not own any cute dog themed cookie cutters, haha, and this time around I did not feel like getting my counter dirty, so I simply rolled the dough into balls and slightly smashed them with a floured shot glass.

As I asked last time, please make sure your dog doesn't have any allergies to these ingredients!  Try in small doses if unsure, and make sure there aren't any upset tummies. I'm hoping to make some limited ingredient treats in the near future.


Peanut Butter Dog Treats #2
Adapted from "A Super Easy Peanut Butter Dog Treat Recipe,"
www.dogtreatrecipes.org
Makes 15-20 servings

  • 2 cups whole wheat flour (plus some extra to flour surface)
  • 1 tablespoon baking powder
  • 1/2 cup oatmeal
  • 1 cup peanut butter (smooth)
  • 1 cup milk


~Preheat your oven to 375°F. Line a baking sheet with parchment paper.


~In a medium bowl, mix the flour, baking powder and oatmeal. Once the ingredients are mixed, add the peanut butter and milk and stir with a heavy spoon until a dough forms.


~Place the dough onto a lightly floured surface and knead it. You will then want to roll out your dough until it is about 1/4" thick.  At this point you can use your cute cookie cutters, or whatever means you like, to get your desired shapes and sizes.


~Bake your treats on your lined baking sheet for roughly 20 minutes, or until golden brown.  For a harder treat, rather than removing them from the oven at this point, turn your oven off, and let the treats sit for another 10 minutes or so.


~Cool them off completely, and let your puppies enjoy!  These should be stored in an air tight container or zip lock bag.
Daisy gave these her seal of approval as well!

Saturday, March 3, 2012

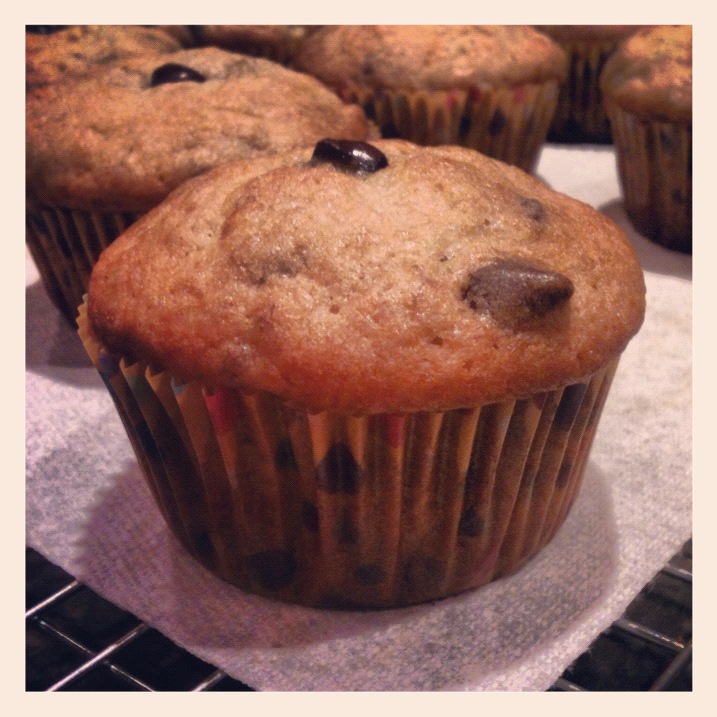
Chocolate & Peanut Butter Chip Banana Muffins


The original recipe called solely for chocolate chips, but I had some peanut butter chips lying around and I couldn't resist!  Bananas and peanut butter go together so well.

I enjoyed these, as they were not too dense and relatively easy to make.

I only had nonfat greek yogurt in the fridge, so that's what I used, and they turned out fine.

The best thing about muffins is that you don't have to wait for them to cool! haha

Chocolate & Peanut Butter Chip Banana Muffins
Adapted from Lois Gordon's Chocolate Chip Banana Muffins
allrecipes.com
Makes 15-17 muffins

  • 1 3/4 cups all-purpose flour
  • 1 teaspoon baking powder
  • 1 teaspoon baking soda
  • 1/2 teaspoon salt
  • 3/4 cup sugar
  • 1 egg
  • 1/2 cup vegetable oil
  • 1/2 cup plain yogurt
  • 1 teaspoon vanilla extract
  • 1 cup mashed ripe bananas (took me 2 large bananas)
  • heaping 1/3 cup semisweet chocolate chips
  • heaping 1/3 cup peanut butter baking chips

~Preheat oven to 350 °F.  Prepare muffin tins with liners.

~In a medium bowl, mix together the flour, baking powder, baking soda, and salt.

~In a large bowl whisk together the sugar, egg, vegetable oil, yogurt, and vanilla extract.  Add flour mixture, and whisk just until incorporated.

~Fold in the mashed bananas, chocolate chips, and peanut butter chips.  

~Fill your liners about two-thirds full and bake for 20 to 24 minutes, or until a toothpick inserted into the center comes out clean. (21 minutes was spot on for me, and I had 15 good sized muffins)

~Let cool in the pan for 5 minutes, and then remove muffins to a wire cooling rack.  I recommend trying some while still warm, enjoy!

Monday, November 7, 2011

Peanut Butter Dog Treats


The only thing I changed from the original recipe is using whole wheat flour, as the original recipe called simply for flour.  My dogs loved these, so I wouldn't change a thing.  Please make sure your dog doesn't have any allergies to these ingredients!  Try in small doses if unsure, and make sure there aren't any upset tummies.  
This is a lot like a scone mix, and the treats are softer.  The drops I made were a little on the large side as I always split a treat between dogs, and I rarely give them one serving at a time, lol, but you could definitely make at least 24 if you prefer a more typical dog treat size.   They do rise, so space accordingly.

Peanut Butter Dog Treats
Adapted from "Another Yummy Peanut Butter Dog Treat," 
www.dogtreatrecipes.org
Makes 24 servings
  • 1 cup flour (whole wheat)
  • 1/2 cup milk (I use skim)
  • 2 tablespoons peanut butter (smooth)
  • 1/4 cup grated Parmesan cheese
  • 1 egg white
  • 1 tablespoon chicken broth or stock
  • 1 teaspoon baking powder


~Preheat your oven to 400°F. Line a baking sheet with parchment paper.


~Add the first 6 ingredients in a large mixing bowl and stir until well mixed.  Add the baking powder and mix again until incorporated.


~Drop spoonfuls of your mix onto your baking sheet.

~Bake for 15-20 minutes or until golden brown.  Cool them off completely, and let your puppies enjoy! These should be stored in an air tight container or zip lock bag.
If you wanted to know who I baked these for, here she is!  You'll be seeing lots more of Daisy.